Authentic Brazilian Cheese Bread – Pao de Queijo
Do you want to make Brazilian Cheese Bread – Pao de Queijo? I will show you how to make them on the stove, using the conventional method, and how to make them in the Thermomix.
With this step-by-step recipe, you can easily make these little cheese balls at home. I hope that once you try it you will love this popular snack as much as we do. So don’t forget to pin it!
SAVE THIS RECIPE 💌
The post has extra tips to make sure the recipe comes out amazing on your first try. If you're in a rush, use the link above to jump to the recipe card at the end! 👩🍳🔝
Pão de queijo recipe
What are paõ de queijo?
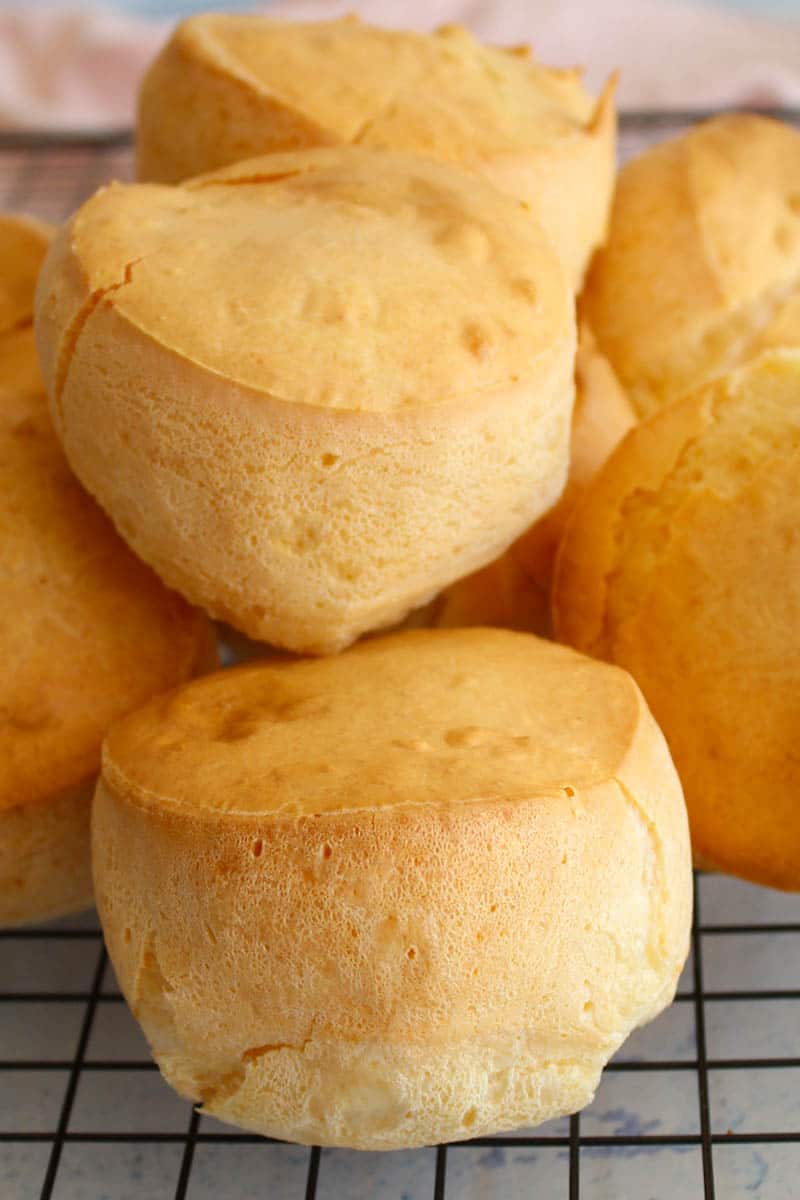
Pao de Queijo is Brazilian cheese bread made with tapioca flour, milk, and cheese. It is traditionally eaten for breakfast or as a snack during the day.
It is a traditional Brazilian recipe that originates in the state of Minas Gerais. Pão de queijo, like many other Brazilian foods, originated from Portuguese colonists.
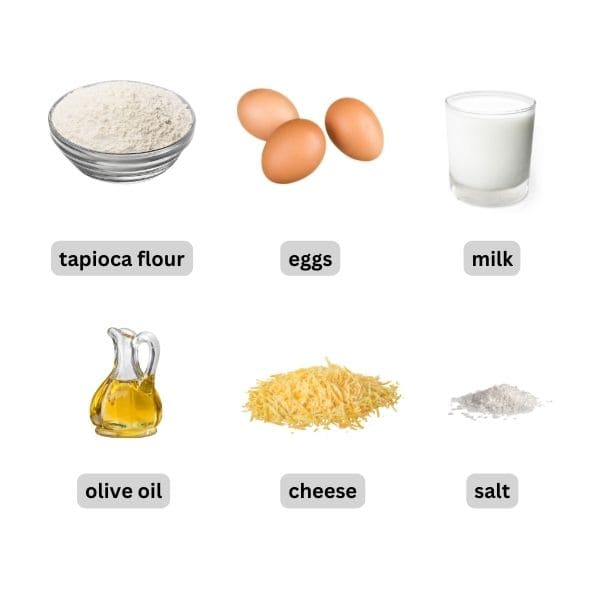
Ingredients for pâo de queijo
To make this popular Brazilian cheese bread we will need:
- Tapioca flour. There are two types of tapioca flour, sweet tapioca flour (polvilho doce) and sour tapioca flour (polvilho azedo).
To make authentic Brazilian cheese bread I recommend using sweet variety. If you can’t find Brazilian tapioca flour, you can find Asian tapioca in the Asian section of most grocery stores.
- Cheese. Any hard cheese variety works in this recipe. My favorite is the mix of parmesan cheese and cheddar.
- Milk.
- Eggs. Opt for free-range if possible
See the full list of ingredients in the recipe card below 👇
How to make pāo de queijo
There are many ways to make authentic Brazilian cheese bread. I will show you how to make it using the stove method without any kitchen appliances (all you need is a medium saucepan and a wooden spoon) and how to make them in the Thermomix. Those methods are quite different so pay attention. Let’s dive in.
Pao de Queijo the stove method
- Preheat your oven to 200°C (400°F) and prepare a baking tray by lining it with some parchment paper.
- Prepare the Tapioca Flour: Place the tapioca flour in a large mixing bowl. Make sure to use a heat-resistant mixing bowl for this step.
- Warm the Milk Mixture: In a medium-sized saucepan, heat the milk, olive oil, and salt over medium heat. Heat the milk until it’s hot but not boiling.
- Combine Milk Mixture and Tapioca Flour: Pour the hot milk mixture into the mixing bowl with the tapioca flour. Stir vigorously with a wooden spoon until all the ingredients are thoroughly combined. The mixture will form a dough-like consistency.
- Cool the Dough: Allow the dough to cool for about 15 minutes. This brief rest period lets the ingredients settle and makes it easier to work with.
- Add Eggs and Cheese: Beat the eggs and add them to the dough along with grated cheese. Initially, it may seem like they won’t blend, but keep mixing—it will all come together beautifully in the end.
- Shape the dough into 1-inch balls and arrange them on a baking sheet lined with parchment paper. You can use a cookie scoop to ensure all balls are the same size. NOTE: If your dough is too runny, you can use a muffin tin, like in the Thermomix method below 👇
- Bake for approximately 20 minutes or until the cheese bread puffs up and turns golden brown. The outside will be wonderfully crunchy, while the inside remains soft and gooey.
Tip about the tapioca dough 💡
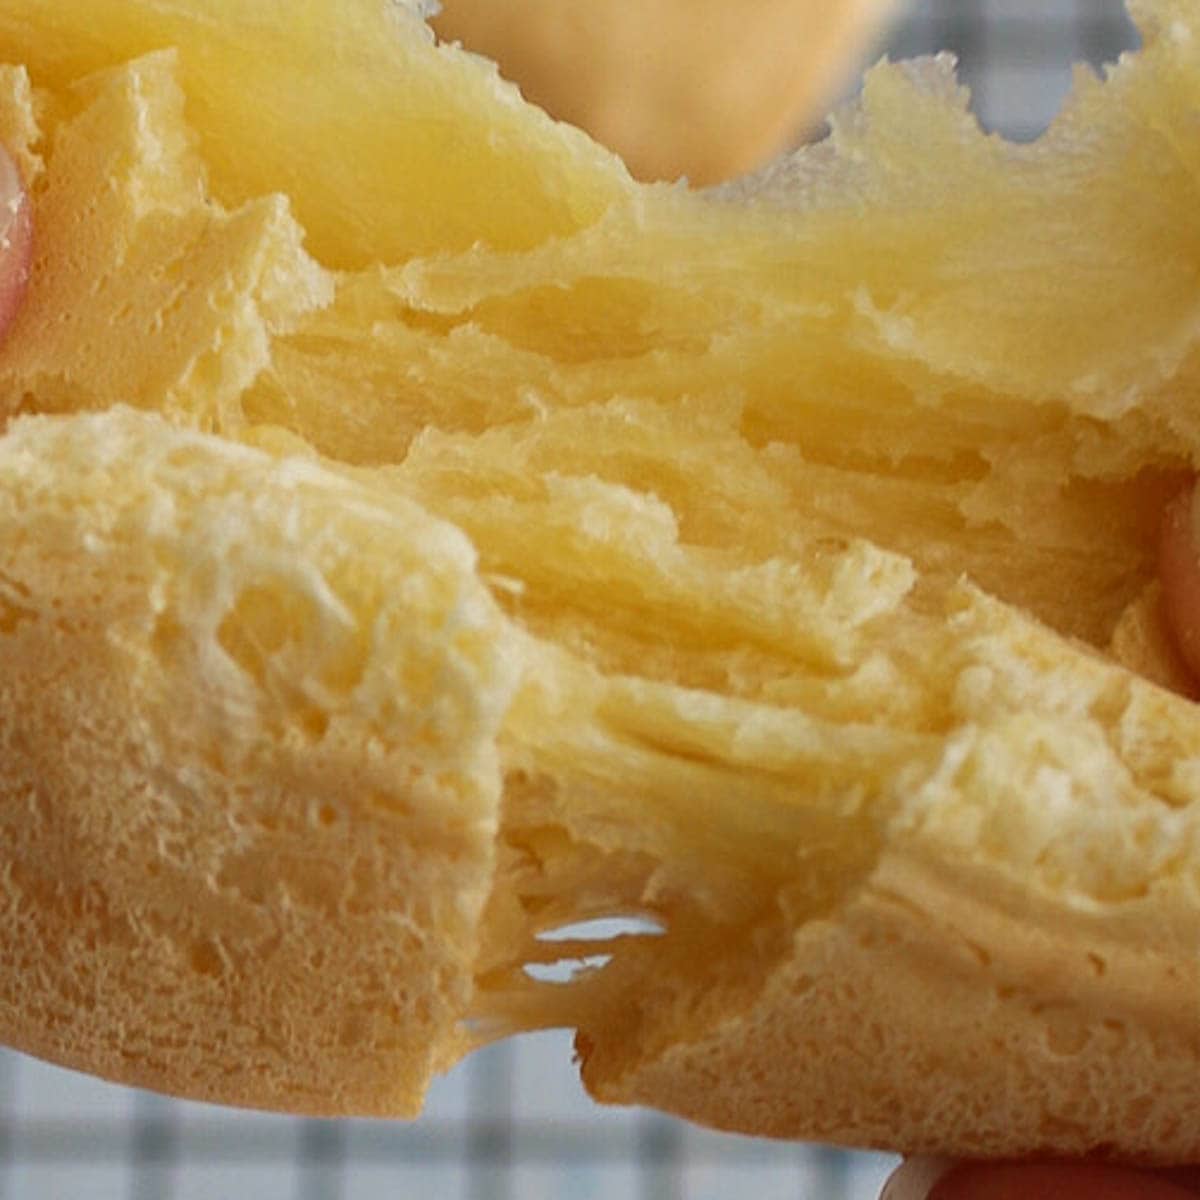
These Brazilian cheese rolls are made with tapioca flour. If you are not familiar with baking with tapioca flour, you might be a bit surprised by the texture of the dough. The dough will be very soft, gooey, and white and your kids will probably beg you to let them play with it if they see it.

So please don't feel discouraged if it looks like it hasn't worked, just keep mixing and everything will work out in the end. I promise you will end up with perfect Pao de Queijo at the end.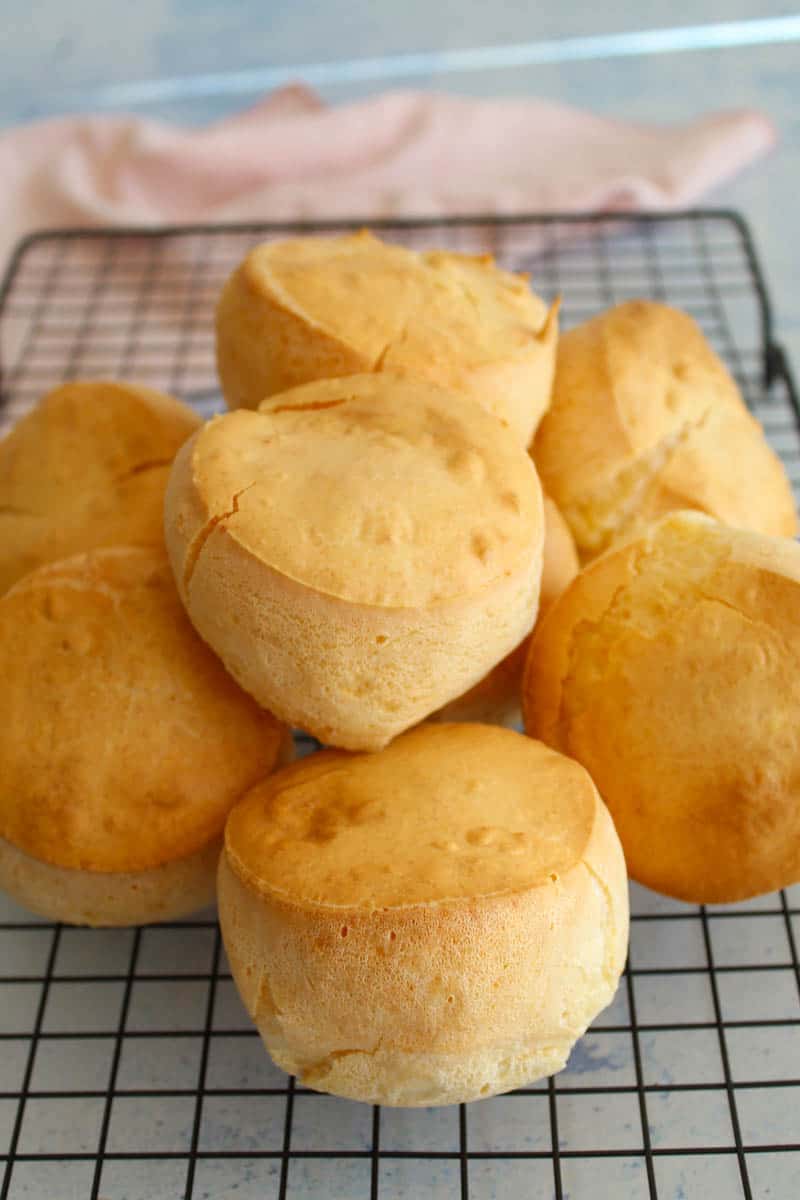
Pao de Queijo thermomix method
If you have a Thermomix this recipe is simply a breeze.
- Preheat your oven to 200°C (400°F)
- In your Thermomix, add the milk, olive oil, and salt (excluding the cheese). Heat the mixture to 90°C for 5 minutes on speed 1.
- Add the tapioca flour to the warm milk mixture and blend on speed 6 for 20 seconds. The result should be a smooth and well-combined dough.
- Allow the dough to cool down for about 15 minutes. This resting period helps the dough settle and become more manageable.
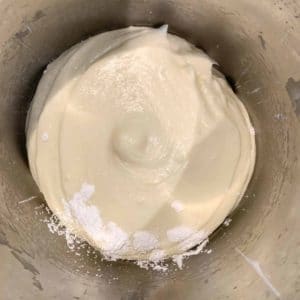
- Now, add the grated cheese and eggs to your Thermomix. Mix the dough for 20 seconds on speed 6. You’ll notice the dough turning soft, gooey, and very white.
- Transfer the dough to a bowl and let it chill in the fridge for 10 minutes before proceeding to the next step.
- THE DOUGH WILL BE QUITE RUNNY, YOU CAN’T MAKE BALLS OUT OF IT.
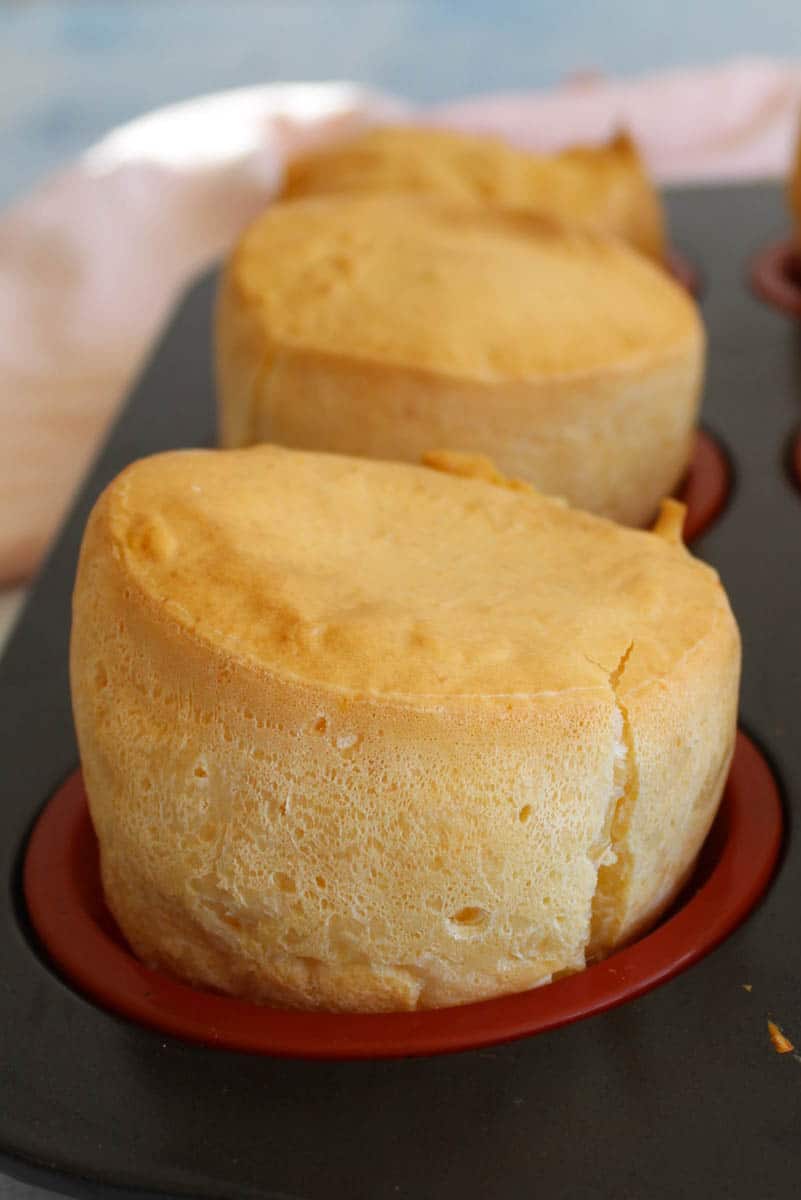
- Grease a muffin tin with a touch of extra virgin olive oil. This recipe yields 12 rolls. To portion the dough, use a cookie or ice cream scoop, filling the tins until they’re about ¾ full.
- Place the muffin tin into a preheated oven and bake for approximately 20 minutes or until they look nice and golden.
How to serve Pao de Queijo
In Brazil, pão de queijo is a beloved traditional snack that’s enjoyed in various settings and ways. Many Brazilians start their day with pão de queijo alongside a hot cup of coffee or a glass of fresh fruit juice. It’s a quick and satisfying breakfast or morning snack. It’s often served with butter, cream cheese, or requeijão (a creamy cheese spread).
This typical Brazilian snack is not only gluten-free but also nut-free, which makes it a great idea for a lunch box. Even though it tastes the best straight out of the oven, it is still incredibly delicious the next day and my kids love it. I mean who wouldn’t love something so cheesy!!

You can also prepare the dough in advance, refrigerate it overnight, and bake the cheese bread fresh in the morning. I wouldn’t do it every day of the week, but as an occasional treat, it is a pretty good idea.
And of course, you can serve them as you would serve any other bread at the dinner table, with soup and stews.
Try my other bread recipes
How to store
- If you plan to consume the cheesy rolls within a day or two, store them in an airtight container or a resealable plastic bag at room temperature. They’ll maintain their texture and flavor just fine in a cool, dry place.
- For longer storage, place the cheesy puffs in an airtight container or ziploc bag and refrigerate them. This can keep them fresh for up to a week. However, note that refrigeration might cause the rolls to lose some of their crispiness, you can reheat them in the oven before serving.
How to freeze
- Before freezing, make sure the rolls are completely cooled to room temperature.
- Place rolls on a baking tray and place them in a freezer for an hour.
- Once the rolls become firm, transfer them into airtight freezer-safe containers or resealable freezer bags.
- Place the rolls in the freezer. They will stay fresh for up to 3 months.
- Thawing and Reheating:
- When you’re ready to enjoy your frozen Cheesy Brazilian Rolls, reheat the frozen rolls in a preheated oven at 180°C (350°F) for about 15-20 minutes.
Have you tried this recipe? If so, I’d greatly appreciate it if you could leave a star rating and share your thoughts in a comment. Your feedback means a lot to me, and it can also help others who are interested in trying it out. Thank you! 🌟👩🍳
Recipe

Authentic Brazilian Cheese Bread – Pao de Queijo
SAVE THIS RECIPE 💌
Ingredients
- 150 g of grated cheddar cheese or any other cheese you prefer, My favourite is a mix of cheddar and Parmesan.
- 200 ml milk
- 100 ml extra virgin olive oil. You can use melted butter as well.
- 1 tsp sea salt
- 300 g tapioca flour
- 3 free-range eggs
- extra olive oil for greasing muffin tin
Instructions
Pao de Queijo Thermomic method:
- Preheat your oven to 200°C (400°F)
- In your Thermomix, add the milk, olive oil, and salt (excluding the cheese). Heat the mixture to 90°C for 5 minutes on speed 1.
- Add the tapioca flour to the warm milk mixture and blend on speed 6 for 20 seconds. The result should be a smooth and well-combined dough. Allow the dough to cool down for about 5 minutes.
- Now, add the grated cheese and beaten eggs to your Thermomix. Mix the dough for 20 seconds on speed 6. You'll notice the dough turning soft, gooey, and very white.

- Transfer the dough to a bowl and let it chill in the fridge for 10 minutes before proceeding to the next step.
- Now grease the muffin tin with some extra virgin olive oil. The recipe will make 12 rolls. Using a cookie or an ice cream spoon, scoop the dough into the tins so they are 3/4 full.

- Place the muffin tin into a preheated oven and bake for approximately 20 minutes or until they look nice and golden.
- Bake at 200’C (400’F) for 20 minutes or until they look nice and golden. They will be crunchy outside and soft and gooey inside.


The stove method:
- Preheat your oven to 200°C (400°F) and prepare a baking tray by lining it with some parchment paper.
- Place the tapioca flour in a large mixing bowl. Make sure to use a heat-resistant mixing bowl for this step.
- In a medium-sized saucepan, heat the milk, olive oil, and salt over medium heat. Heat the milk until it's hot but not boiling.
- Pour the hot milk mixture into the mixing bowl with the tapioca flour. Stir vigorously with a wooden spoon until all the ingredients are thoroughly combined. The mixture will form a dough-like consistency.
- Allow the dough to cool for about 5 minutes. This brief rest period lets the ingredients settle and makes it easier to work with.
- Beat the eggs and add them to the dough along with the grated cheese. Initially, it may seem like they won't blend, but keep mixing—it will all come together in the end. Let it cool in the fridge for 10-15 minutes.
- Shape the dough into 1-inch balls, wetting your hands slightly to prevent sticking, and arrange them on a baking sheet lined with parchment paper. You can use a cookie scoop to ensure all balls are the same size.
- If your dough is too runny, you can use a muffin tin, like in the Thermomix method above 👆
- Bake for approximately 20 minutes or until the cheese bread puffs up and turns golden brown. The outside will be wonderfully crunchy, while the inside remains soft and gooey.
- Serve immediately.
Notes


Danke für das Rezept .Wen ich Tapiokamehl kaufe ,werde ich es ausprobieren.
Worked for me, thank you for the recipe!!
I tried this and at the moment I’m confused as to how it works. I followed your recipe but right now it’s just yellow and crumbly… I used a stand mixer and used the dough extension, I guess I should have used the whisk extension? Can this be fixed? There’s no way it’ll become all smooth
Hi Emma, try to add a little more warm milk and knead it with your hands.