How to make salmon nigiri in an ice cube tray
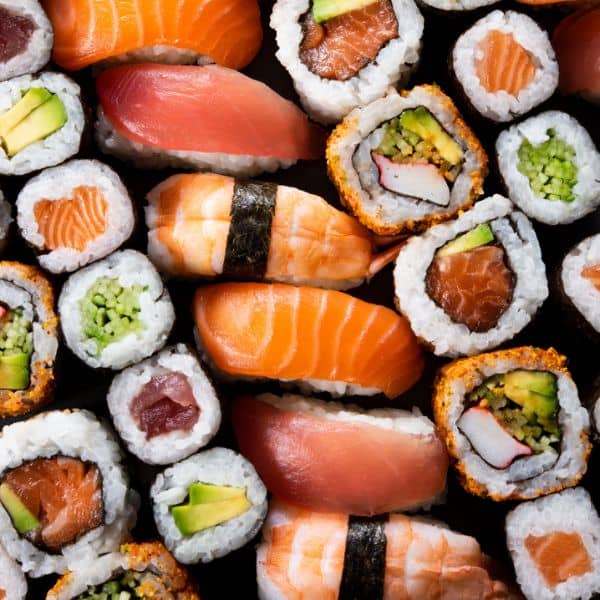
Today, I will show you how to make salmon nigiri sushi at home. Follow this easy step-by-step guide and enjoy the most delicious sushi in no time. This recipe is truly revolutionary. 😁
⏱️ In a hurry? Use the Jump to Recipe button above. If you’ve got a minute, you’ll find my best tips, step-by-step photos and serving ideas below.
SAVE THIS RECIPE 💌

Do you like sushi? I do! And so do my kids. However, you must have noticed that the prices for sushi rolls have doubled in the last year, going from $2.50 per roll to $4.80 at my local sushi place. Which makes it rather an expensive go-to snack. So, what should we do? Make homemade sushi, of course!
I have to add a disclaimer at this point that this sushi recipe is probably not the most authentic one. The art of making sushi is a skill that requires precision, creativity, and perseverance. Becoming a really good sushi chef takes years. However, this recipe will show you how to make sushi that you and your family will enjoy without paying a fortune to dine in Japanese restaurants. Furthermore, it uses an amazing trick how to make them fast! Let’s dive in.
How to make salmon nigiri
Why will you love this salmon nigiri recipe?
Let’s explore what makes this recipe so good:
- Easy to make: If you’re not a sushi chef, making sushi can seem intimidating. But fear not! This cheat recipe is quick and requires no special skills, making it accessible to everyone.
- Nourishing and well-rounded: This nigiri sushi makes for a delicious and healthy lunch or dinner option. Packed with protein from salmon, carbs from sushi rice, and fats from avocado, it’s a perfectly balanced meal.
- Family-friendly: Kids love sushi, and they’ll enjoy being a part of making their own nigiri. This recipe is a great way to get the whole family involved in the kitchen and have fun together.
- Gluten-free: If you have celiac disease, you know that many restaurant sushi options contain gluten. By making sushi at home, you can enjoy a gluten-free meal and eliminate any risks.
- Budget-friendly: Making sushi at home is much more cost-efficient than ordering takeout or dining out. With this recipe, you can enjoy delicious sushi without breaking the bank.
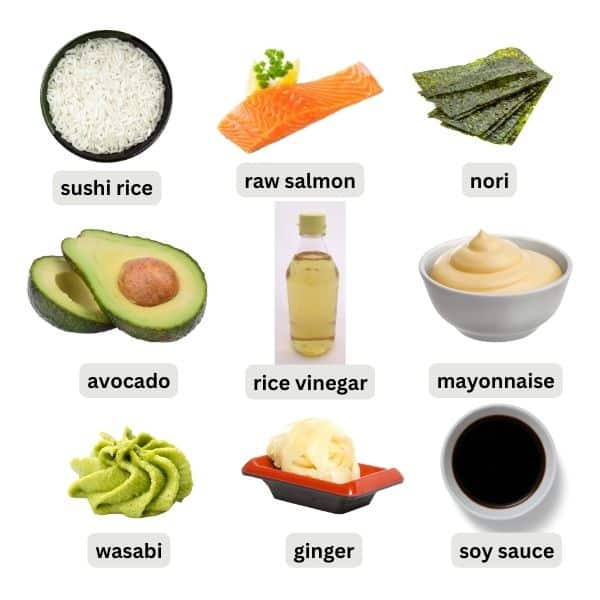
Ingredients for salmon nigiri
- Japanese sushi rice, cooked (Refer to my how-to-make sushi rice recipe for instructions).
- Sushi vinegar.
- Ripe avocado.
- Salmon fillet (Make sure to use very fresh fish).
- Nori.
- Mayonnaise.
- Soy sauce (Use tamari for a gluten-free option).
- Pickled ginger and a small dab of wasabi paste to serve.
See the full list of ingredients in the recipe card below.
Essential tools for sushi nigiri
There are many different kinds of sushi in Japanese cuisine, from sushi rolls to maki, to sashimi, to inarizushi. All of them require years of learning and practice. But this doesn’t mean that we can’t make sushi at home. To make my variation of sushi nigiri, we will need the following ingredients:
- Medium-sized pan to cook sushi rice or a rice cooker.
- Large bowl for mixing rice with rice vinegar.
- A cutting board.
- A very sharp knife.
- An ice cube tray to make large rectangular ice cubes.
- Plastic wrap, such as Glad wrap.
A word about salmon.
To make sushi, you will need the highest quality fish you can find. Ask your fish shop for sashimi or sushi-grade fish. If you would like to learn more about salmon and which variety is the best for our consumption, make sure to read my EASY FURIKAKE SALMON RECIPE.
How to make sushi nigiri at home
Here comes the most exciting part: we are making sushi. And as promised, this sushi recipe is a little bit of a cheat recipe. Let me explain why.
We already discussed that making sushi is an art, but our love for sushi is too strong to limit ourselves to occasional special treats. So if you, like me, don’t have any idea how to make hand-formed sushi, this recipe is for you!
How to make sushi vinegar
If you don’t have ready-to-go sushi vinegar you can easily make it yourself.
- Simply combine 1/3 cup of rice vinegar with 1 tablespoon of sugar. Stir the vinegar with a spoon until the sugar has dissolved completely. Your sushi vinegar is ready to be used.
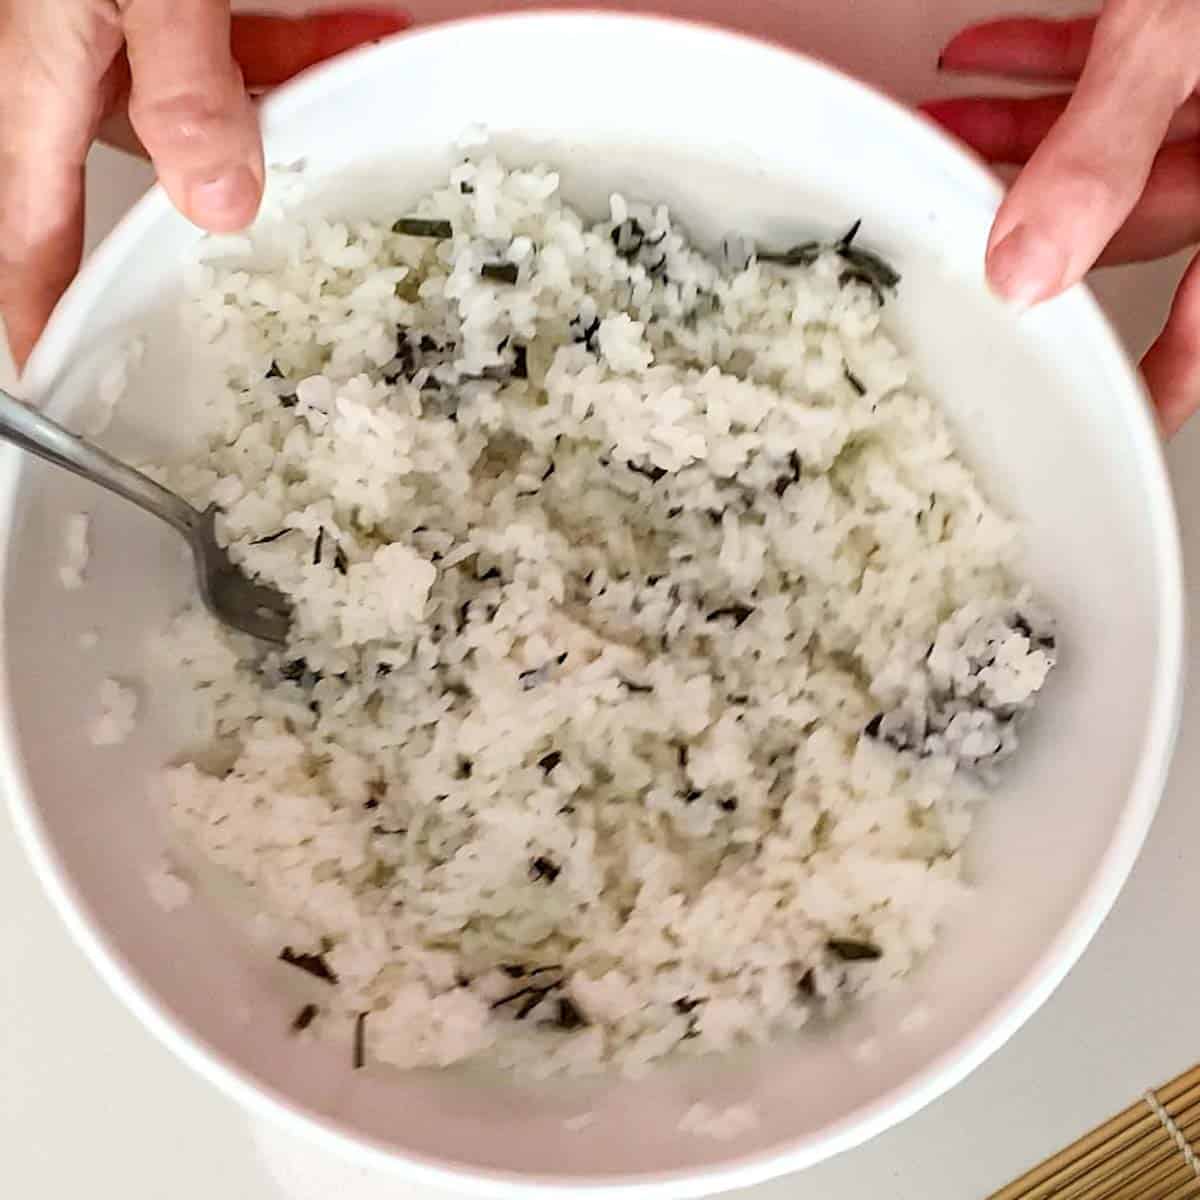
Preparing the sushi rice
- Start by cooking sushi rice. You can use a rice cooker or use my recipe HOW TO MAKE SUSHI RICE.
- Once the rice is cooked, transfer it to a large mixing bowl and add sushi rice vinegar and the shredded nori sheets. Mix the rice gently using a wooden spatula or spoon.

Making salmon nigiri
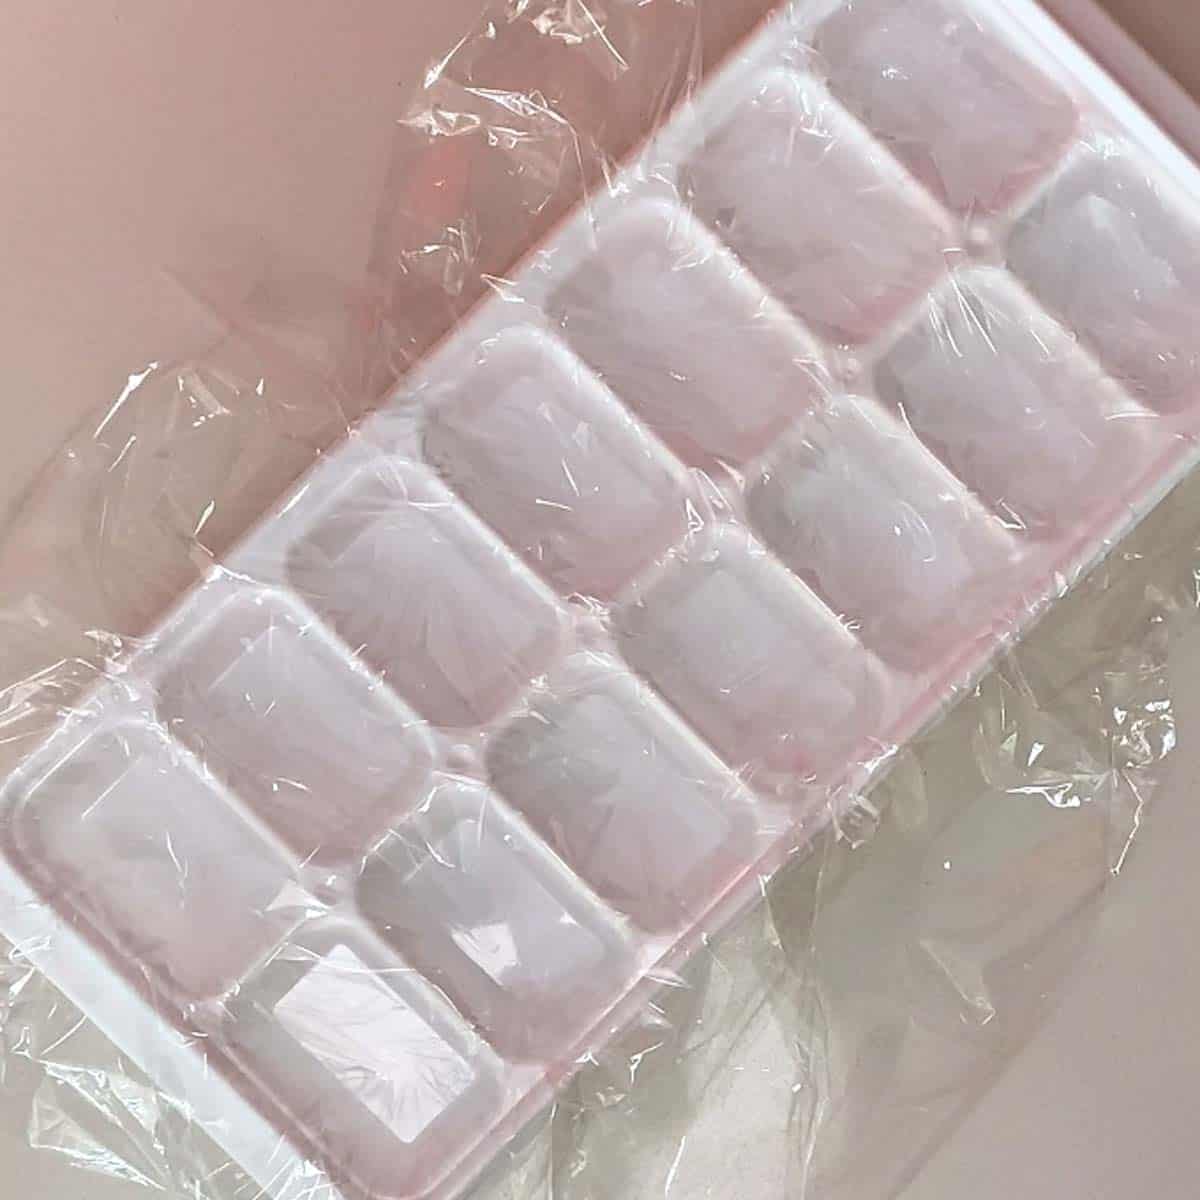
- Line the ice cube tray with some plastic wrap and make some dips in every ice cube section.
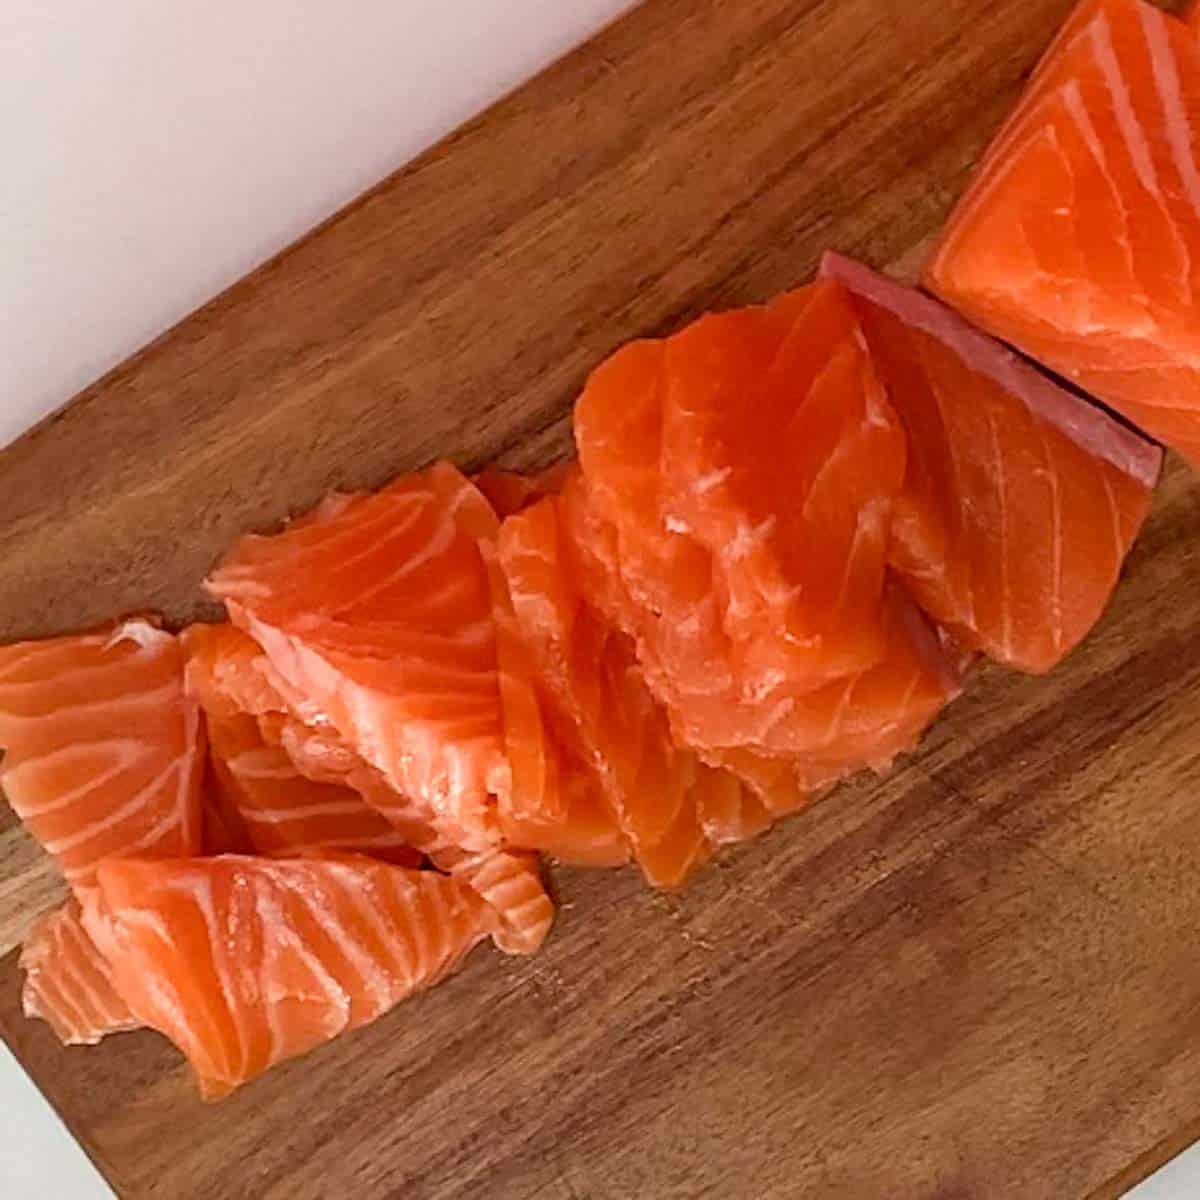
- Using a sharp knife, slice your salmon into small rectangles, and place a thin slice of fish into every ice cube tray section, pressing it gently to the bottom of the tray.
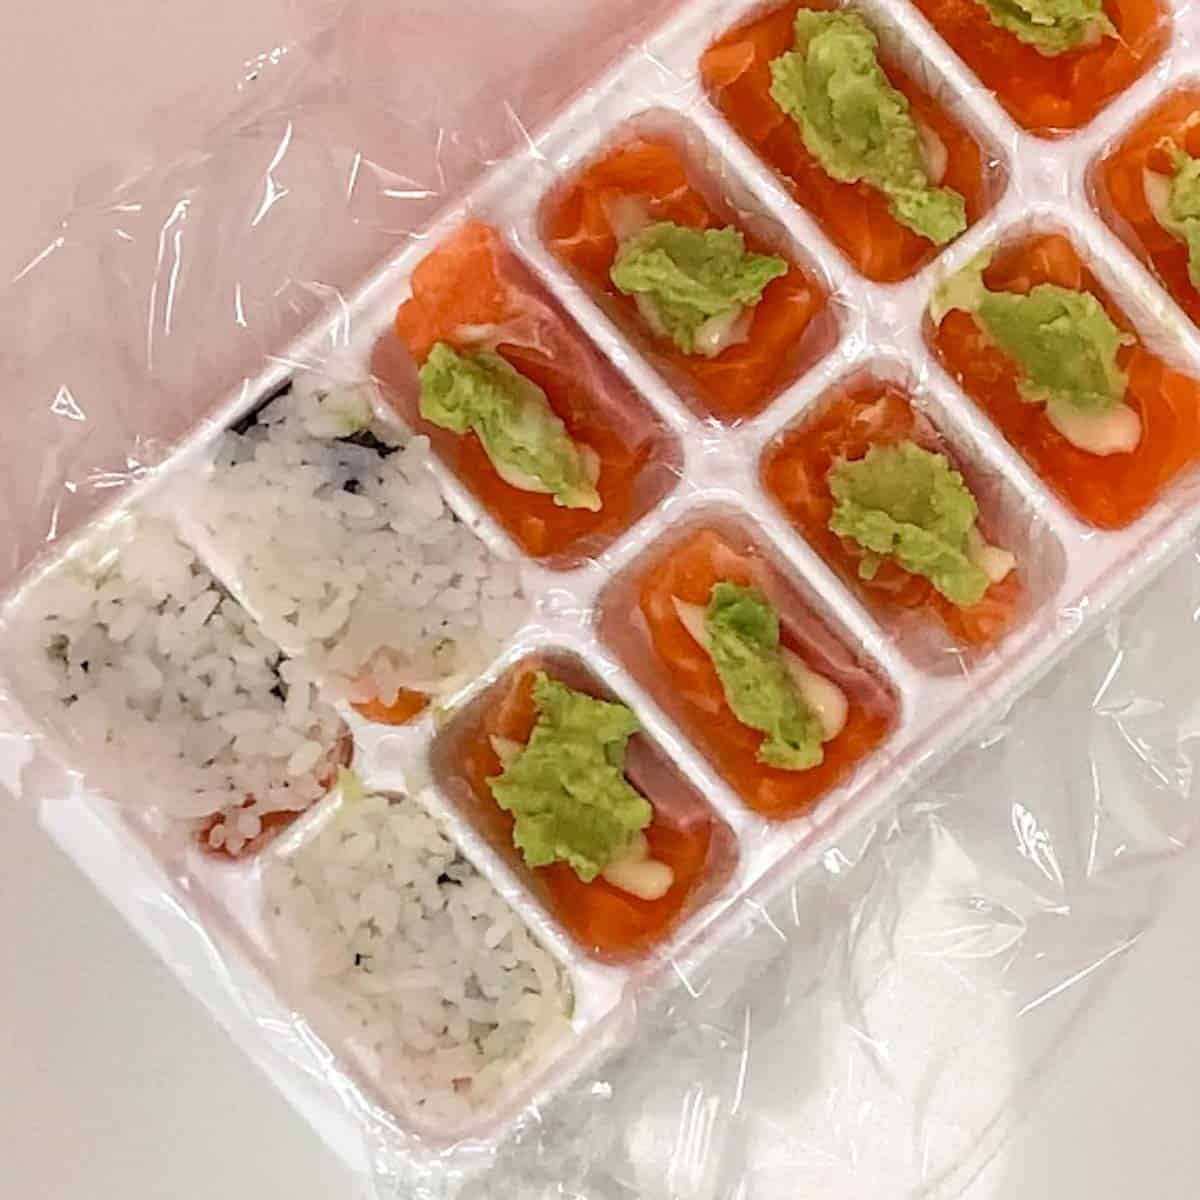
- Add a little amount of your favorite mayonnaise on top of the salmon.
- Place some smashed avocado onto the mayo.
- Finish with a teaspoon of cooked rice. The tray should now be filled with sushi ingredients.
- Press gently to make it flat.
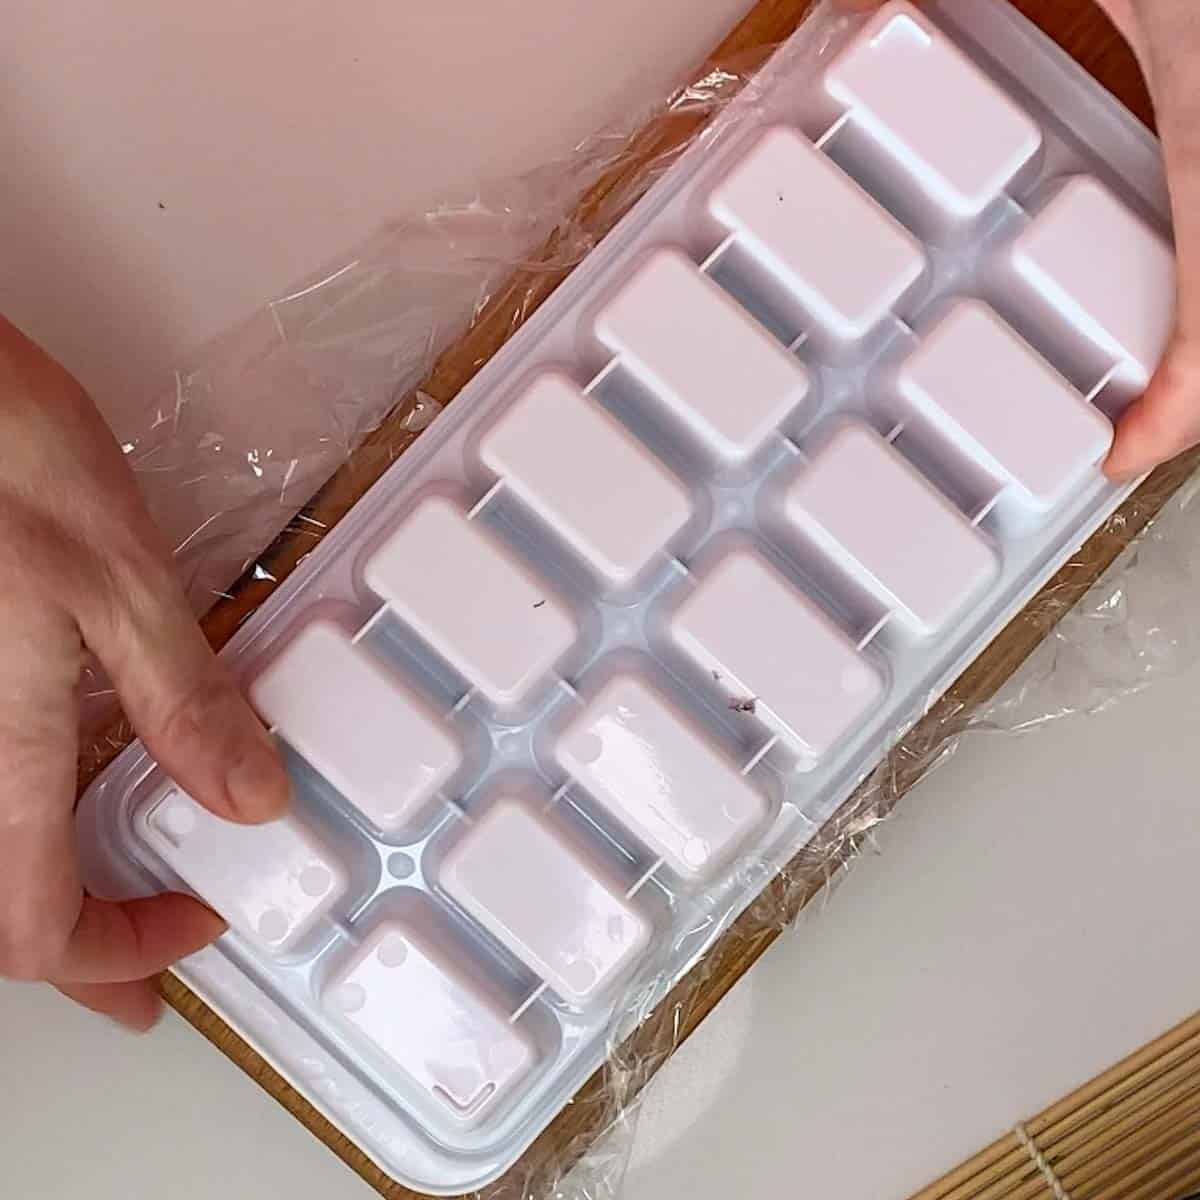
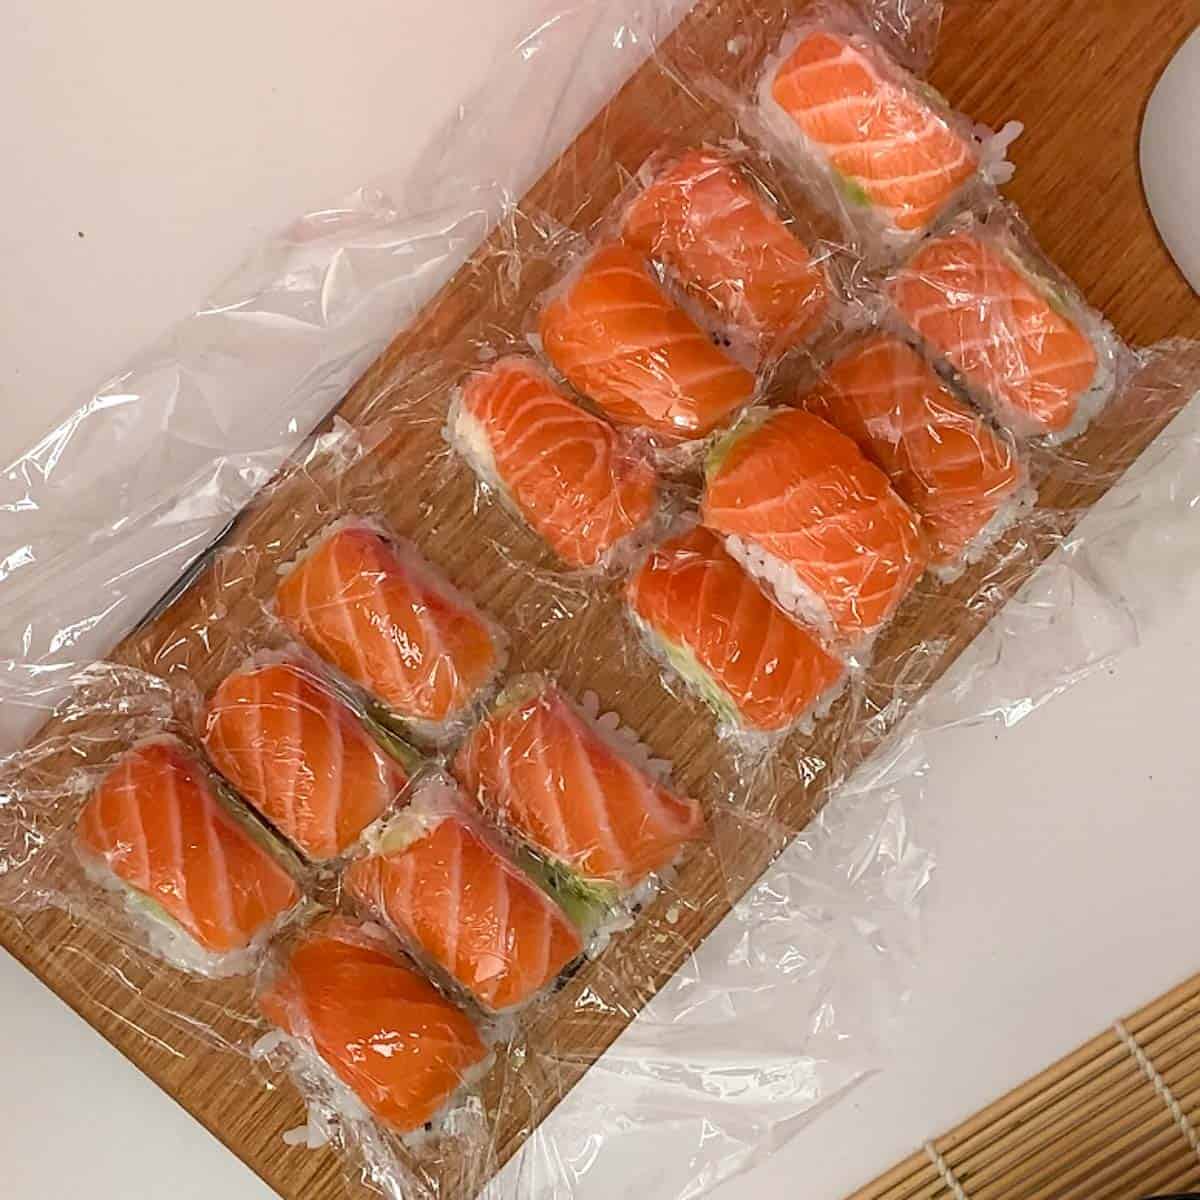
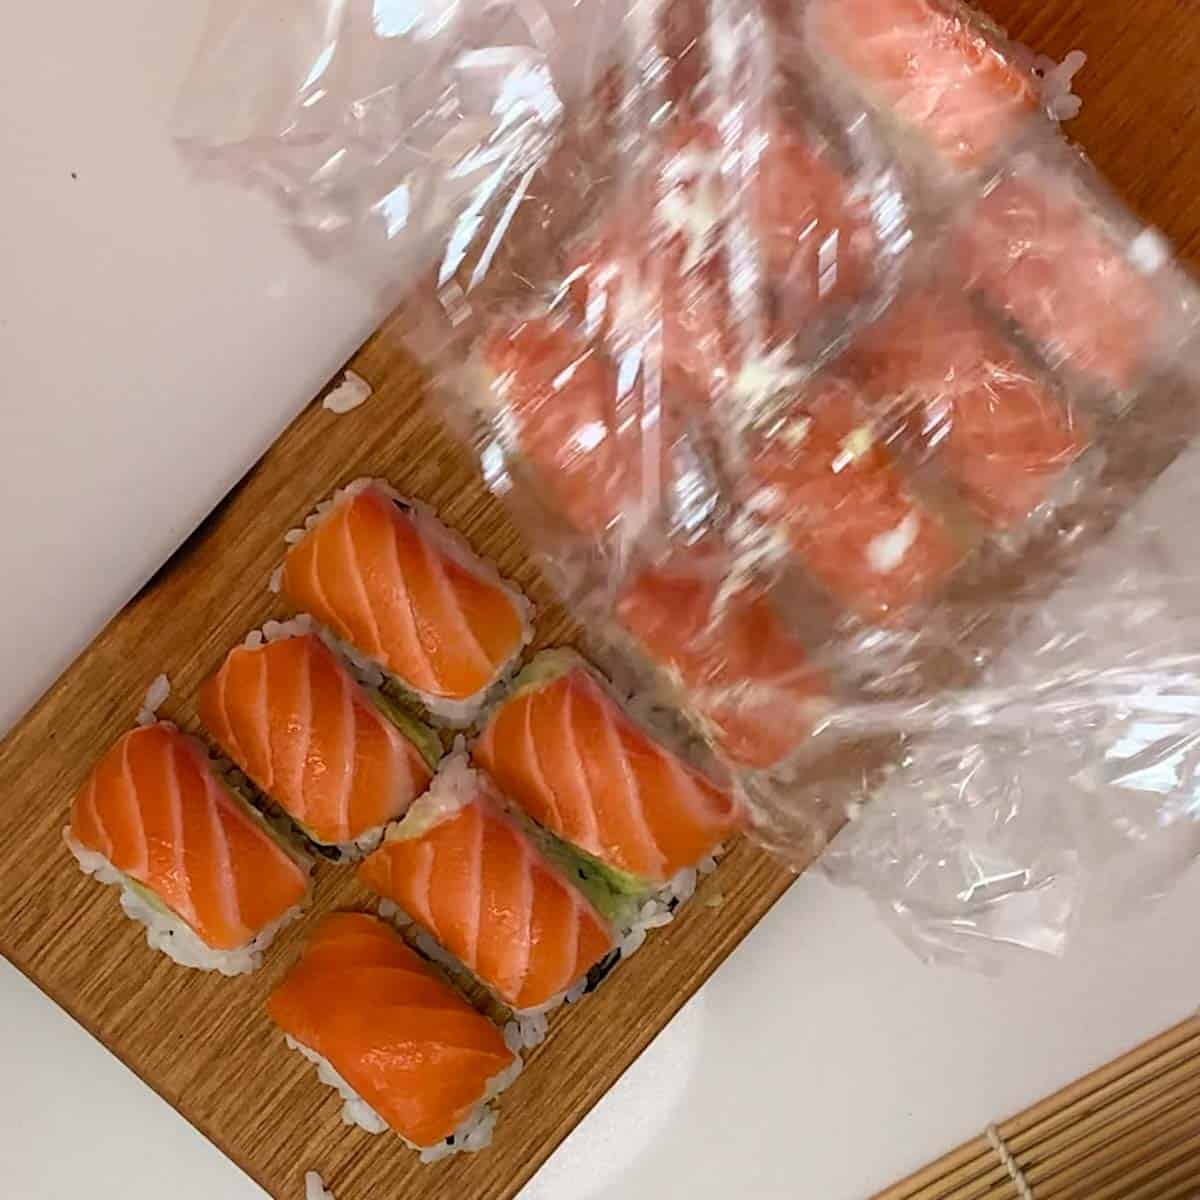
- Carefully turn the tray upside down onto a cutting board and slowly lift the ice cube tray, allowing the sushi to come out of the tray.
- Remove the plastic wrap, carefully transfer them onto a serving plate or board, and there you go! The delicious treat is ready to be served.
Variations
- To make tuna nigiri, simply replace the salmon with tuna fish.
- Use smoked salmon to make smoked salmon sushi nigiri
- Use fresh shrimp (prawns) to make shrimp nigiri.
- You can add a small amount of wasabi to every slice of fish before placing it in the ice tray to add some heat.
How to store salmon nigiri
If you would like to make salmon nigiri in advance, you can prepare them 2 or 3 hours ahead of time. Cover them with plastic wrap and refrigerate until ready to serve.
However, I do not recommend storing raw salmon for any longer than that to avoid the risk of food poisoning. It’s best to consume the sushi within a few hours of preparation.
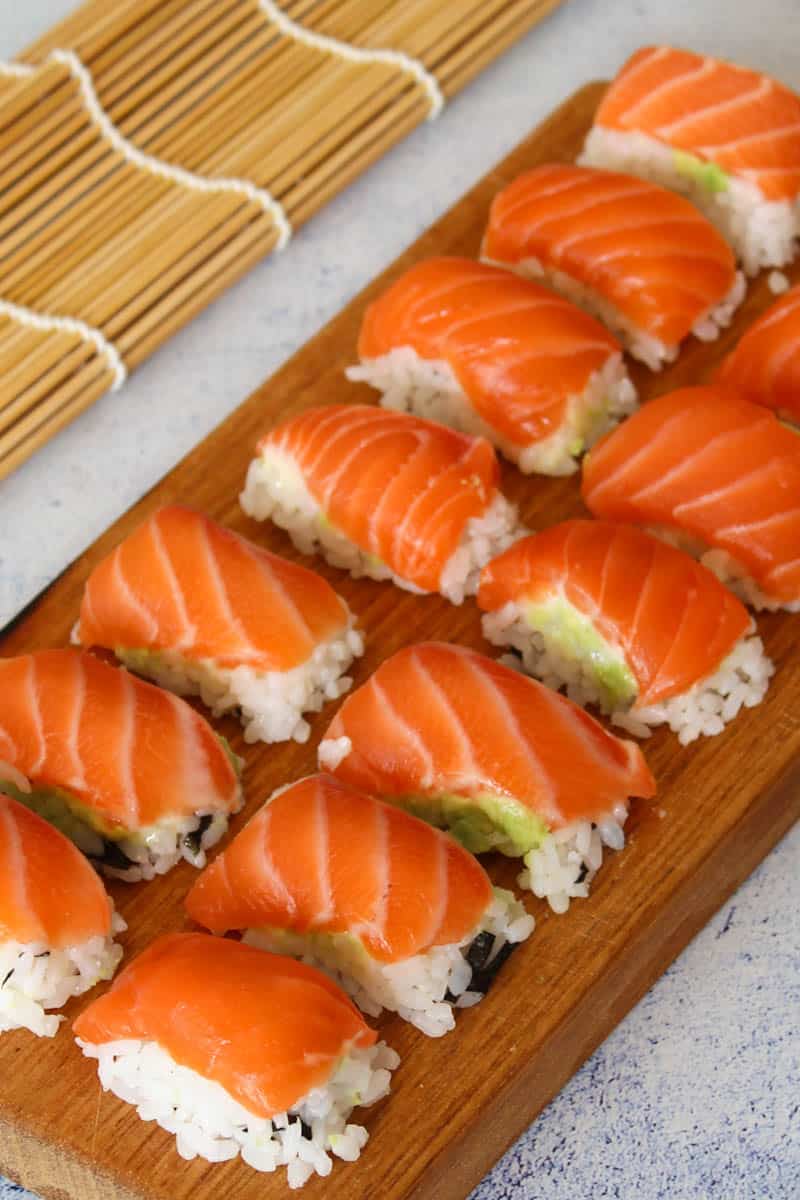
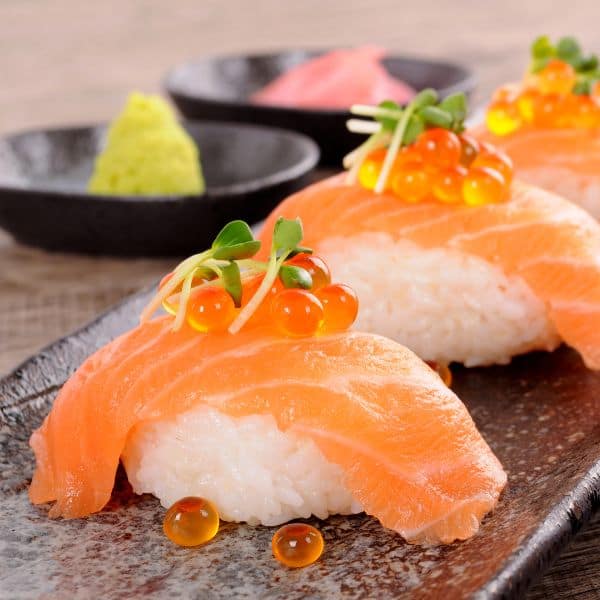
How to serve salmon nigiri
You can serve salmon nigiri on a nice chopping board with the fish side up. Add a small amount of wasabi (Japanese horseradish) and some pickled ginger as accompaniments.
Frequently asked questions
Sushi nigiri, in its traditional form, is gluten-free. However, some sauces, such as soy sauce, may contain gluten. If you have celiac or are sensitive to gluten, it’s important to use gluten-free soy sauce such as tamari.
I don’t recommend freezing sushi nigiri. It’s best to enjoy nigiri fresh.
Absolutely! Vegetarian and vegan sushi nigiri options are very popular. You can use ingredients like marinated tofu, grilled vegetables, pickled radishes, or even fruit slices to create delicious vegetarian or vegan variations.
More easy Japanese recipes to try
Have you tried this recipe? If so, I'd greatly appreciate it if you could leave a star rating and share your thoughts in a comment. Your feedback means a lot to me, and it can also help others who are interested in trying it out. Thank you! 🌟👩🍳

How to make salmon nigiri
SAVE THIS RECIPE 💌
Ingredients
- 1 cup cooked sushi rice see my recipe how to cook sushi rice without rice cooker.
- 1/3 cup rice vinegar
- 1 teaspoon organic raw sugar (optional)
- 2-3 tablespoons free-range mayonnaise
- 1/2 ripe avocado, mashed
- 1 salmon fillet, aproximatelly 300 grams, sliced
To serve
- 2-3 tablespoons soy sauce or tamari if glute-free
- 1/2 teaspoon wasabi
- 1 teaspoon pickled ginger
Instructions
Sushi rice
- Prepare sushi rice vinegar by combining 1/3 cup of rice vinegar with 1 tablespoon of sugar. Stir the vinegar with a spoon until the sugar has dissolved completely. Set aside.
- Cook sushi rice according to instructions. Once the rice is cooked, transfer it to a large mixing bowl and add sushi rice vinegar followed by shredded nori sheets. Mix the rice gently using wooden spatula or spoon.If you need help read HOW TO MAKE SUSHI RICE.
Preparation
- Mash ripe avocado, set aside
- Slice salmon fillet
Making salmon nigiri in an ice cube tray
- Line the ice cube tray with some plastic wrap and push down the plastic wrap into each ice cube section
- Add a little amount of your favorite mayonnaise on top of the salmon. Place some smashed avocado onto the mayo. Finish with a teaspoon of cooked rice. The tray now should be filled with sushi ingredients. Press gently to make it flat.
- Carefully turn the tray around on a cutting board and slowly lift the ice cube tray.
- Remove the glad wrap, and carefully transfer salmon nigiri onto a serving plate or board. Salmon nigiri are ready to be served.
Video
Notes
Variations
- Make tuna nigiri, by simply replacing salmon with tuna fish.
- Use smoked salmon to make smoked salmon sushi nigiri
- Use fresh shrimp (prawns) to make shrimp nigiri.
- You can add a small amount of wasabi to every slice of fish before placing it in the ice tray to add some heat.


What a great idea!! This really is easy to make and tastes amazing!
So quick and easy 😊
So schöne Erinnerungen !!!!
This is very delicious.. thank you for sharing.
What a great way to make sushi! Delicious!
such an easy recipe!
this is a great recipe. I never imagined delicious Sushi could be so easy! Thank you for the beautiful step-by-step pictures and instructions! Yum 5 Stars!